
Pests and Diseases
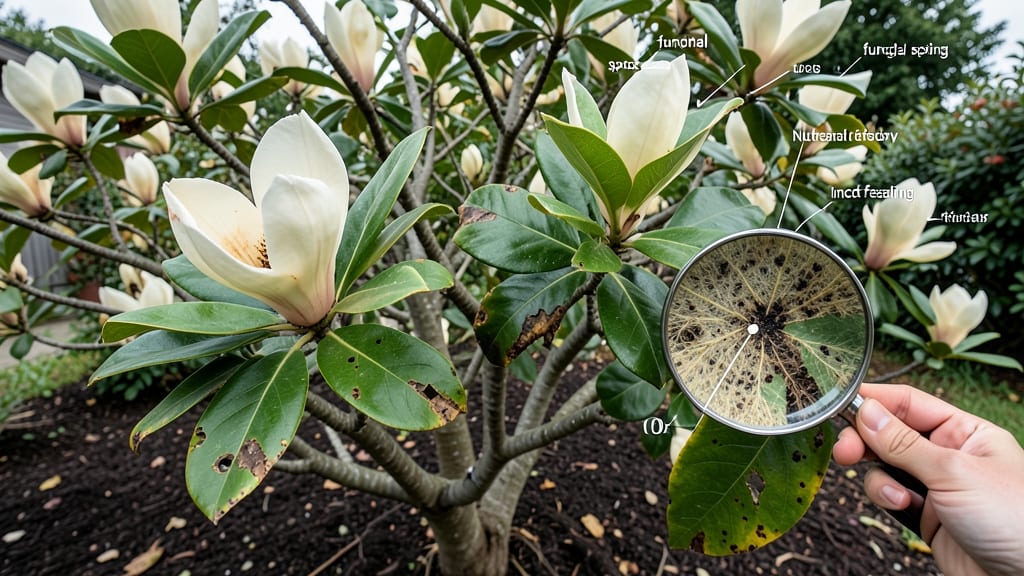
Those mysterious brown spots on your magnolia leaf damage aren’t just cosmetic—they’re a silent warning. 🌿 I’ve seen powdery mildew, tar spot, and even scale insects turn a once-vibrant tree into a leafy mess, but the good news? Most damage is preventable with the right moves.
First, grab your magnifying glass and inspect the damage: are the spots fuzzy (mildew), sticky (scale), or ring-shaped (fungus)? Healthy magnolias resist pests better when they’re well-watered, pruned properly, and planted in the right spot. The key is acting fast—once those spots spread, recovery gets harder.
With the right treatment (neem oil, copper fungicide, or pruning out infected branches), you’ll see fresh green growth within weeks. The goal is to keep your tree looking like the showstopper it is, not a sad shadow of its former self.
Works for all magnolia types—southern, star, or saucer—just adjust treatments based on the damage. Let’s get those leaves back to their best!
📚 In This Guide
- What you need
- Instructions
- Tips and common mistakes
- Wrapping up and next steps
What you need
- ● Pruning shears or sharp bypass pruners – 1 pair (sterilized with rubbing alcohol or a 10% bleach solution)
- ● Disposable gloves – 1 pair (nitrile or latex-free for sensitivity)
- ● Fungicide – 1 bottle (copper-based or containing chlorothalonil, myclobutanil, or propiconazole; follow label instructions)
- ● Garden sprayer – 1 (2-3 gallon capacity) (adjustable nozzle for targeted application)
- ● Plastic bags or paper bags – 5-10 (for collecting and disposing of damaged leaves)
- ● Magnifying glass or hand lens – 1 (10x magnification for inspecting leaf spots)
- ● Rake or leaf blower – 1 (for clearing fallen leaves and debris)
- ● Watering can or hose with nozzle – 1 (for rinsing tools and wetting leaves before treatment)
- ● Neem oil or horticultural oil – 1 bottle (natural preventive treatment; mix with water as directed)
- ● Baking soda solution – DIY (1 tsp baking soda + 1 quart water + a few drops of dish soap; for mild fungal issues)
- ● Labeling tape and markers – 1 roll + markers (to mark treated areas for follow-up)
- ● Safety goggles – 1 pair (if working with strong chemicals or near eyes)
- ● Camera or smartphone – 1 (to document damage before/after treatment)
How to diagnose and treat magnolia leaf fungal spots
Here's how I spot and stop fungal infections before they ruin your magnolia's foliage.
🌿 Step 1: Identify the Damage and Confirm Fungal Spots
Start by examining the leaves closely—fungal spots usually appear as dark brown or black circular patches with yellow halos around them. These spots often have fuzzy or powdery edges, which is your clue it's a fungal infection rather than a pest issue. Check the undersides of leaves too, as many fungal spores hide there.
Compare the damage to common magnolia diseases like anthracnose or powdery mildew. Anthracnose spots are usually raised and sunken, while powdery mildew looks like white, dusty coatings on both leaf surfaces. If you see black streaks on stems or leaf drop, the infection is spreading and needs immediate action.
✂️ Step 2: Prune Infected Leaves and Branches
Use sterilized pruning shears (wipe with rubbing alcohol) to remove any leaves with more than 50% damage. Cut back to healthy green tissue—never leave stubs, as fungi can linger there. Bag the infected leaves and dispose of them in the trash (not compost), since fungal spores can survive composting.
For branches with heavy infection, prune 6-12 inches below the damaged area to ensure you remove all traces of the fungus. Thin out crowded branches too—poor air circulation is what lets fungal spores thrive. After pruning, clean your tools again to avoid spreading spores to other plants.
💧 Step 3: Apply a Fungicide Treatment
Choose a copper-based fungicide or a neem oil solution (mix 1 tablespoon neem oil + 1 teaspoon mild soap per quart of water). Spray evenly on both leaf surfaces, focusing on the undersides where spores hide. Apply in the early morning or late afternoon to avoid burning leaves in direct sun.
Reapply the fungicide every 7-10 days until new leaves emerge without spots. If using chemical fungicides, follow the label instructions precisely—overapplying can harm beneficial insects and disrupt your garden's ecosystem. For organic control, repeat applications are key since neem oil breaks down quickly.
☀️ Step 4: Adjust Care to Prevent Recurrence
Magnolias need good airflow—prune surrounding branches to create at least 3 feet of space between plants. Avoid overhead watering, which spreads spores. Instead, water at the base in the morning so leaves dry quickly. If your magnolia is in a shaded area, consider thinning nearby trees to allow at least 4-6 hours of sunlight daily—fungi thrive in damp, shady conditions.
Add 2-3 inches of mulch (like pine bark or shredded leaves) around the base to improve soil drainage and reduce splashing. Avoid thick mulch piles against the trunk, as this traps moisture and encourages fungal growth. Finally, fertilize lightly with a balanced, slow-release fertilizer in early spring to strengthen the tree's defenses.
⏰ Step 5: Monitor and Maintain Long-Term Health
Check leaves weekly for new spots, especially after rain. If you notice yellowing leaves or stunted growth, the fungus may have weakened the tree's roots. In this case, water deeply but less frequently—overwatering stresses magnolias and makes them more susceptible to disease.
Healthy magnolias have deep green, glossy leaves and minimal leaf drop. If your tree recovers but spots reappear next season, consider planting a companion like boxwood or hydrangea nearby—these act as natural barriers to airflow disruption. With consistent care, your magnolia should bounce back fully within one growing season.
Tips & tricks for diagnosing and treating magnolia leaf fungal spots
Common pitfalls—and how to sidestep every one when dealing with fungal infections on your magnolia.
Spot Identification Made Easier: Grab a magnifying glass for Step 1—fungal spots often appear smaller than you think. Look for the yellow halo first; it's the most reliable indicator of fungal activity. I've seen many gardeners mistake spider mite damage for fungal spots because both cause discoloration, but mites leave tiny webs and speckling, not the circular patches with fuzzy edges.
Pruning Precision in Step 2: When removing infected leaves, cut at a 45-degree angle just above a leaf node or bud. This promotes faster healing and prevents water from pooling where you cut. I learned this the hard way—my first attempt left stubs that stayed damp and encouraged more fungal growth. Also, wear disposable gloves to avoid spreading spores to your hands or other plants.
Fungicide Application Secrets: For Step 3, shake your fungicide mixture vigorous before each application—settled particles won't distribute evenly. I like to add 1 teaspoon of baking soda to my neem oil mix (optional) as a natural booster that raises the pH slightly, making it harder for spores to germinate. Always test spray on a small leaf first to check for sensitivity.
Long-Term Prevention: In Step 4, consider installing a drip irrigation system instead of overhead watering. This delivers water exactly where the roots need it while keeping leaves dry. I've seen magnolias recover faster with this setup because the leaves stay dry longer between waterings, reducing the window for fungal spores to thrive.
Pro Tips for Magnolia Leaf Damage
- Common pitfalls—and how to sidestep every one when dealing with fungal infections on your magnolia.
- Spot Identification Made Easier: Grab a magnifying glass for Step 1—fungal spots often appear smaller than you think....
- Pruning Precision in Step 2: When removing infected leaves, cut at a 45-degree angle just above a leaf node or bud. T...
Frequently asked questions
Got questions about magnolia leaf damage? You’re not alone!
Here are answers to the most common concerns—from quick fixes to long-term prevention—so you can keep your magnolia healthy and thriving.
What causes black or brown spots on magnolia leaves?
Fungal diseases like anthracnose or target spot are the usual culprits. Overwatering, poor air circulation, or wet foliage (especially in humid climates) create the perfect breeding ground. Look for dark, circular spots with yellow halos—a classic sign of fungal infection.
When is the best time to treat magnolia leaf damage?
Act early—as soon as you spot symptoms! Spring (before new growth) or early summer is ideal for fungicide applications. If damage appears in fall, focus on cleaning up debris and improving airflow to prevent winter spread. Pro tip: Prune infected leaves immediately to stop spores from spreading.
Are there natural remedies for magnolia leaf spots?
Yes! Try a baking soda spray (1 tsp baking soda + 1 quart water + a drop of dish soap) or neem oil (2 tbsp per gallon of water). For severe cases, copper fungicides are effective. Always test sprays on a small leaf first to avoid burns.
Can magnolia leaf damage be prevented?
Improve airflow
by pruning dense branches, water at the base (avoid overhead spraying), and mulch around the tree to reduce soil splashing. Bonus: Plant magnolias in full sun (6+ hours/day) to boost natural resistance.
Should I remove the entire magnolia tree if leaves are severely damaged?
Not necessarily! If only a few branches are affected, prune them out and treat the rest. However, if 50%+ of the tree shows symptoms or the trunk is infected, removal may be the safest option. Warning: Never compost infected plant debris—dispose of it in sealed bags.
Still stumped? Snap a photo of the damage and compare it to online guides (like the University of Florida’s magnolia disease database) for a second opinion!
Wrapping up and next steps
Spotting magnolia leaf damage early and acting fast can save your prized tree from fungal spots and pests! 🌿 With the right tools—like neem oil, copper fungicide, or proper pruning—you can restore your magnolia’s health and keep it thriving. Don’t wait until the problem spreads! Grab your supplies, follow the steps, and give your tree the TLC it deserves.
💡 Next step: Inspect your magnolia’s leaves today and start treatment if needed. A little effort now means a lush, beautiful tree for years to come!