
Pruning
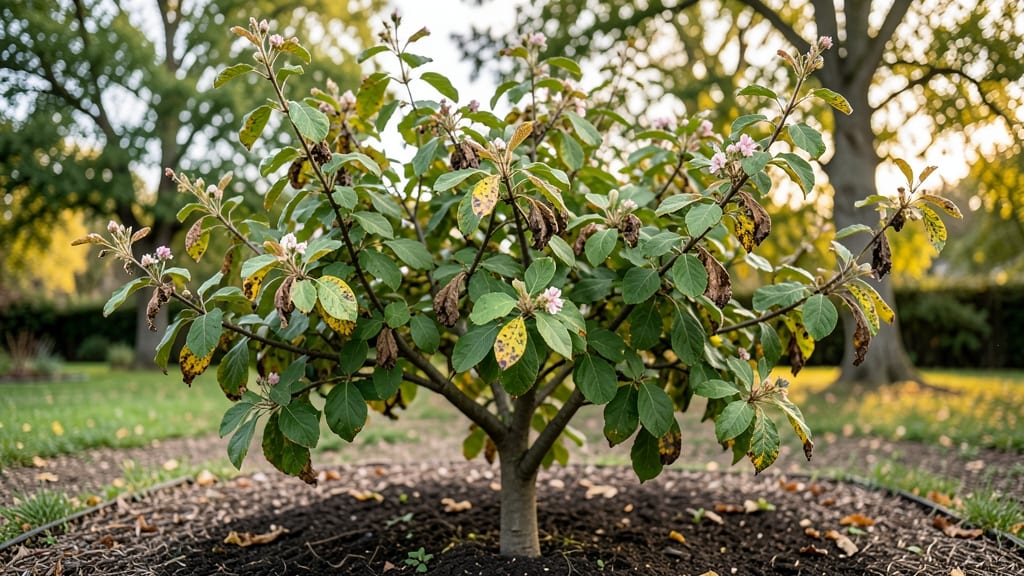
Plum tree leaf problems like brown rot or fungal spots can turn your lush canopy into a sad, spotted mess—unless you act fast. 🌿 I’ve seen healthy trees go from vibrant green to pathetic in weeks, but the good news is most issues respond well to organic fixes once you know what you’re dealing with.
The first step is identifying the culprit: tiny dark spots with yellow halos? That’s likely fungal. Blackened leaves with oily residue? Probably bacterial.
Once you know the enemy, you can treat it—copper sprays for bacterial spots, neem oil for fungal infections, and a good cleanup of fallen leaves to stop the cycle.
With the right approach, you’ll see new growth pushing through within 2-3 weeks, and your tree will bounce back stronger than ever. The key is consistency—don’t wait for the problem to spread before acting. This works for backyard plum trees, orchard varieties, and even container-grown trees.
Let’s get those leaves healthy again!
📚 In This Guide
- What you need
- Instructions
- Tips and common mistakes
- Wrapping up and next steps
What you need
- ● Pruning shears or bypass pruners – Sharp, clean, and disinfected (sterilize with rubbing alcohol or a 10% bleach solution). Quantity: 1 pair.
- ● Garden gloves – Durable, nitrile-coated to protect against thorns and fungal spores. Quantity: 1 pair.
- ● Neem oil (100% cold-pressed) – For organic fungicide treatment. Quantity: 1–2 oz per gallon of water.
- ● Baking soda – For a DIY fungicide spray. Quantity: 1 tbsp per gallon of water.
- ○ Horticultural oil or soap (optional) – For stubborn fungal or insect issues. Quantity: 1–2 tsp per gallon of water.
- ● Spray bottle or garden sprayer – Adjustable nozzle for even coverage. Quantity: 1.
- ● Disinfectant (bleach or rubbing alcohol) – For cleaning tools and preventing cross-contamination. Quantity: Small bottle.
- ● Plastic sheeting or tarp – To collect fallen leaves/debris. Quantity: 1–2 sheets.
- ● Compost bin or trash bag – For disposing of infected leaves. Quantity: As needed.
- ● Copper fungicide spray – For severe fungal infections (follow label instructions).
- ● Beneficial fungi (e.g., Trichoderma) – Natural soil amendment to boost tree health.
- ● Magnifying glass – For closely inspecting leaf symptoms.
- ● Label maker or markers – To tag treated areas if testing multiple remedies.
How to diagnose and treat plum tree leaf fungal issues
Here's how I identify and fix those pesky fungal spots before they spread.
🌿 Step 1: Identify the Problem by Examining Leaf Patterns
Start by collecting a few affected leaves and place them on a white sheet of paper. Look closely for distinct patterns: black or purple spots with yellow halos suggest fungal issues like anthracnose, while white powdery coatings indicate powdery mildew. I always check the undersides of leaves first—they often show symptoms before the tops.
Run your fingers gently over the leaf surface. If you feel a rough, velvety texture, that's powdery mildew. For other fungal spots, you might notice raised, sunken, or greasy-looking areas. Take photos from multiple angles to compare with online resources—visual clues are key to accurate diagnosis.
🌱 Step 2: Prune Infected Branches at the Right Time
Use clean, sharp pruning shears to remove any branches with more than 50% leaf damage or those showing signs of dieback. Cut back to just above a healthy leaf bud or lateral branch. I always sterilize my tools with rubbing alcohol between cuts to prevent spreading spores.
Dispose of pruned material immediately in a sealed trash bag—never compost infected leaves. The best time to prune is on a dry, sunny morning when humidity is low. This gives the tree time to heal before evening moisture sets in and encourages fungal growth.
💧 Step 3: Apply Organic Fungicides at the Right Intervals
Mix a solution of 1 tablespoon baking soda with 1 quart water and a few drops of dish soap as a spreader-sticker. Spray thoroughly on both leaf surfaces, focusing on undersides where spores hide. Repeat every 7-10 days during wet seasons or after heavy rains.
For more severe cases, I use a neem oil solution (1 tablespoon neem oil + 1 teaspoon mild soap per quart of water). Apply in the late afternoon when temperatures are below 85°F to avoid leaf burn. Always test a small branch first to check for sensitivity.
☀️ Step 4: Improve Airflow and Soil Health
Thin out dense branches to create 3-4 feet of space between limbs—this prevents humidity buildup in the canopy. I also remove any ground debris within a 5-foot radius of the tree, as fallen leaves trap moisture and spores.
Add a 2-3 inch layer of organic mulch around the base, keeping it 6 inches away from the trunk. This improves soil drainage and reduces splash-back from irrigation. Water at the base of the tree in the morning to allow foliage to dry quickly—never overhead water.
⏰ Step 5: Monitor and Prevent Recurrence
Check the tree weekly during growing season for new spots. I keep a simple log of treatment dates and weather patterns—this helps me adjust my approach. For example, if spots reappear after rain, I know to increase spray frequency during that season.
In late fall, apply a thin layer of compost around the drip line to boost soil immunity. Healthy soil supports beneficial microbes that naturally suppress fungal pathogens. Prune again in late winter to remove any lingering infected wood before new growth begins.
Tips & tricks for treating plum tree leaf fungal issues
Real talk: Catching fungal problems early makes all the difference for your plum tree's health.
Diagnosis Tip: When examining leaves in Step 1, use a magnifying glass for better visibility—those tiny details like yellow halos or velvety textures are easier to spot. I keep one in my gardening toolkit specifically for this purpose. Also, don't forget to check the tree's lower branches where shade and moisture often create ideal fungal conditions. The undersides of leaves are particularly vulnerable, so give them extra attention.
Pruning Strategy: In Step 2, I recommend cutting back an extra inch beyond the visible damage—this ensures you remove all infected tissue. Sterilize your tools between cuts with rubbing alcohol, not just between trees. I've seen cases where gardeners sterilized between trees but not between branches, leading to cross-contamination. Also, collect pruned material in a sealed bag and add it to your regular trash, not compost—fungal spores can survive composting.
Treatment Timing: For the baking soda solution in Step 3, I've found that applying it on a cloudy day maximizes effectiveness. The solution works best when it can sit on the leaves without evaporating too quickly. And when using neem oil, always shake the bottle well before measuring—settled oil can clog your sprayer. I also recommend applying treatments in the late afternoon as instructed, but only if your forecast predicts dry conditions overnight.
Preventive Care: When improving airflow in Step 4, consider installing a small fan on a timer near the tree during humid periods. This creates gentle airflow that discourages fungal growth without damaging the tree. I've seen remarkable results with this approach, especially during summer months when humidity spikes. Also, water at the base in the morning as instructed, but let the soil dry out completely before watering again—soggy soil is a fungal magnet.
Pro Tips for Plum Tree Leaf Problems
- Real talk: Catching fungal problems early makes all the difference for your plum tree's health.
- Diagnosis Tip: When examining leaves in Step 1, use a magnifying glass for better visibility—those tiny details like ...
- Pruning Strategy: In Step 2, I recommend cutting back an extra inch beyond the visible damage—this ensures you remove...
Frequently asked questions
Why are my plum tree leaves turning yellow or brown?
Yellowing or brown leaves are often signs of fungal infections (like brown rot or leaf spot) or nutrient deficiencies. Check for spots, powdery coatings, or curled edges—these hint at disease. If soil is dry or compacted, roots may struggle to absorb water/nutrients. Test leaves for pests and amend soil with compost to boost health.
When is the best time to treat fungal spots on plum leaves?
Act fast! Treat early spring (before buds swell) or fall (after harvest) to prevent spores from spreading. Avoid spraying when rain is forecasted—it washes treatments off. For severe cases, repeat every 7–10 days until new growth appears. Pro tip: Prune infected branches in the morning when humidity is lower.
Are chemical fungicides safe for organic plum trees?
If you’re committed to organic methods, skip synthetic fungicides. Instead, use baking soda spray (1 tbsp baking soda + 1 gallon water + a drop of dish soap), neem oil, or copper-based sprays. Always test a small leaf first—some varieties are sensitive. For heavy infestations, combine treatments with proper sanitation.
Can I save my plum tree if most leaves are spotted?
Yes! Even heavily affected trees can recover with aggressive action:
- Remove all infected leaves/branches (sterilize pruners with rubbing alcohol).
- Apply a preventative fungicide (like potassium bicarbonate) every 2 weeks.
- Improve air circulation by thinning dense branches.
- Water at the base, not overhead, to reduce moisture on leaves.
How do I tell if leaf problems are from disease vs. pests?
Use this quick guide:
Symptom
Likely Cause
Black/brown spots with yellow halos
Fungal disease (e.g., brown rot, anthracnose)
Holes, chewed edges, or sticky residue
Pests (aphids, Japanese beetles, mites)
White powdery coating
Powdery mildew (fungal)
Curling, stunted leaves
Viral/bacterial infection or nutrient deficiency
Wrapping up and next steps
Diagnosing and treating plum tree leaf problems doesn’t have to feel overwhelming—with the right knowledge and organic care, your tree can bounce back stronger than ever! 🌿 Whether it’s fungal spots, pests, or nutrient deficiencies, early action is key.
Start by identifying the issue, then apply the fixes outlined here to restore your tree’s health naturally.
Ready to take the next step? Grab your gloves, gather your supplies, and give your plum tree the TLC it deserves. A little effort now means plenty of sweet plums (and happy leaves!) for seasons to come. 🍑✨