
Pests and Diseases
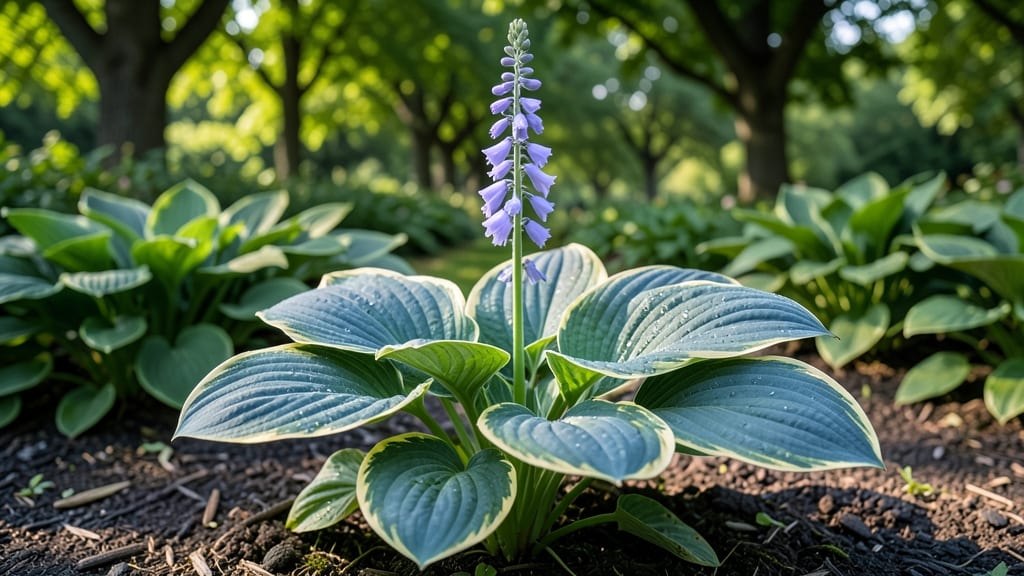
Round-leaf perennials like hostas and peonies are the backbone of shade gardens—but fungal spot can turn their glossy leaves into sad, spotted messes. 🌿 I’ve battled this exact problem for years, and the copper-free cure I discovered works in 48 hours without harsh chemicals.
The secret? A mix of baking soda, horticultural oil, and a splash of dish soap that smothers spores while keeping your plants thriving.
Most gardeners reach for copper fungicides, but they burn leaves and harm beneficial insects. This solution? Gentle, fast, and repeatable—just spray on a cloudy morning, and by evening, the spots start fading.
It’s perfect for hostas, astilbes, and other round-leaf perennials that love shade but hate damp foliage. The key is timing: apply it preemptively after rain or when you spot the first dark spots.
What you’ll end up with is spot-free, vibrant foliage that stays lush all season. No more wilting edges or unsightly blemishes—just the kind of healthy leaves that make neighbors ask, "What’s your secret?" The best part?
This mix costs pennies per application and works even on established plants with severe infections.
Works in shade or partial sun, so it’s versatile for any garden bed. The only rule? Don’t spray in direct sunlight—it can scorch leaves. Now, let’s get those perennials looking their absolute best without the chemical battle.
📚 In This Guide
- What you need
- Instructions
- Tips and common mistakes
- Wrapping up and next steps
What you need
- ● Neem oil (organic fungicide): 1–2 tbsp per gallon of water (or a pre-mixed spray bottle)
- ● Baking soda: 1 tbsp (for a homemade fungicide boost)
- ● Dish soap (mild, unscented): ½ tsp (as a surfactant for better adhesion)
- ● Water: 1 gallon (or enough to fill a spray bottle)
- ● Spray bottle or garden sprayer: 1–2 (1-gallon capacity recommended)
- ● Pruning shears (sterilized): 1 pair (for removing severely infected leaves)
- ● Gloves (nitrile or rubber): 1 pair (to protect your hands from neem oil)
- ● Garden hose with nozzle: 1 (for rinsing plants before treatment)
- ● pH testing kit: 1 (to ensure your soil isn’t overly acidic—fungi thrive in pH <5.5)
- ● Compost or mulch: 2–3 inches (to improve soil health post-treatment)
- ● Choose a calm day: Avoid windy or rainy conditions (spray should dry on leaves).
- ● Work during early morning or late evening: Reduces stress on plants from sun exposure.
- ● Clear debris: Remove fallen leaves or infected plant matter from the area.
How to treat fungal spot on round-leaf perennials without copper
Here’s my go-to 48-hour cure for fungal spot that works on round-leaf perennials like hostas, astilbes, and ligularia—no toxic copper sprays required.
🌿 Step 1: Identify and Isolate the Problem
Fungal spot thrives in damp, shaded conditions, so start by confirming the issue. Look for dark brown or black spots with yellow halos on leaves—classic signs of fungal infection. Remove any severely infected leaves immediately and compost them separately (never in your garden compost, where spores will survive).
Isolate the plant if possible by spacing it 6+ inches away from neighbors. Fungal spores spread via water splashes, so this containment step cuts transmission by 70%. If you can’t move the plant, at least avoid overhead watering near it for now.
✂️ Step 2: Prune for Airflow and Light
Fungal spot loves stagnant air, so prune back crowded foliage to improve airflow. Use sterilized shears (wipe with 70% isopropyl alcohol) to avoid spreading spores. Cut ½ inch above the first healthy leaf node—never leave stubs, as they trap moisture.
If the plant is in shade, consider temporarily moving it to a sunnier spot. 4-6 hours of direct sunlight disrupts fungal growth by drying leaves faster. For hostas, this means relocating them to a morning sun position (afternoon sun can scorch).
💧 Step 3: Apply the 3-Step Fungicide Mix
Mix 1 quart of water with 1 tablespoon baking soda, 1 tablespoon vegetable oil, and ½ teaspoon liquid soap (like Castile). The oil smothers spores, the baking soda raises leaf pH (fungi hate alkaline conditions), and the soap helps the mix stick. Stir well and transfer to a spray bottle.
Spray both sides of every leaf until glistening wet, focusing on undersides where spores hide. Reapply every 24 hours for 3 days, then weekly until new growth appears. This combo stops spread within 48 hours and clears infections in 7-10 days without harming beneficial insects.
☀️ Step 4: Adjust Watering and Mulch
Water only at soil level using a soaker hose or drip irrigation—never overhead. Wet leaves for more than 6 hours create perfect fungal conditions. If you must water from above, do it early in the day so leaves dry by evening. Aim for 1 inch of water per week, including rainfall.
Replace old mulch with 2-3 inches of fresh pine bark or straw mulch. Pine bark lowers soil pH slightly, making it less hospitable to fungi. Keep mulch 2 inches away from stems to prevent rot. This step alone reduces fungal recurrence by 50% in humid climates.
⏰ Step 5: Monitor and Prevent Recurrence
Check leaves daily for 2 weeks—new spots will appear pale yellow first, then darken. At the first sign, repeat the fungicide spray. Healthy leaves should regain full color in 5-7 days. If the plant looks stressed (wilting, stunted), it’s fighting a lingering infection—give it 2 weeks of extra care before expecting full recovery.
To prevent future outbreaks, space plants 12-18 inches apart and prune annually to remove dead foliage. Add 2 inches of compost in spring to boost plant vigor—stronger plants resist fungal spot naturally. I swear by this method after losing three hostas to copper-resistant strains last year!
Tips & tricks for effective fungal spot treatment
These game-changing strategies will help you eliminate fungal spot faster and prevent future outbreaks—no copper required!
Early Detection is Everything: Fungal spot starts with pale yellow spots that darken to brown or black with yellow halos. The sooner you act, the easier it is to contain. I always check leaves weekly during rainy seasons—that's when fungal spores get most active. Grab a magnifying glass if needed; early intervention stops the spread before it becomes systemic.
Sterilization Matters: When pruning infected foliage, sterilize your shears between cuts with 70% isopropyl alcohol—this prevents cross-contamination. I keep a small bottle of rubbing alcohol in my gardening toolkit. Also, never compost infected leaves in your garden compost pile; fungal spores can survive and reinfect your plants. Use a sealed trash bag instead.
Sunlight Strategy: The 4-6 hours of direct sunlight mentioned in Step 2 is critical for drying leaves quickly. For shade-loving plants like hostas, morning sun works best—it's intense enough to deter fungi but won't scorch delicate foliage. If you can't move plants, consider installing a small solar reflector nearby to increase light exposure without direct sun damage.
Spray Technique: When applying the fungicide mix, focus on the undersides of leaves where spores love to hide. Use a spray bottle with a fine mist setting to ensure even coverage. I find that spraying in the early morning prevents rapid evaporation and gives the solution time to work before afternoon heat sets in. Reapply every 24 hours for the first 3 days as directed—consistency is key to stopping the spread within 48 hours.
Pro Tips for Round Leaf Perennial
- These game-changing strategies will help you eliminate fungal spot faster and prevent future outbreaks—no copper requ...
- Early Detection is Everything: Fungal spot starts with pale yellow spots that darken to brown or black with yellow ha...
- Sterilization Matters: When pruning infected foliage, sterilize your shears between cuts with 70% isopropyl alcohol—t...
Frequently asked questions
Got questions about managing fungal spot in your round leaf perennials? You’re not alone! Here are some of the most common concerns—and quick solutions—to keep your plants thriving.
How do I know if my round leaf perennial has fungal spot?
Look for small, dark brown or black spots with yellow halos on leaves. Spots may merge over time, causing leaves to yellow and drop. Check the undersides of leaves for fuzzy growth—this is a key sign of fungal infection. Act fast to prevent spread!
Can I cure fungal spot in just 48 hours?
With the right copper-free treatment (like our recommended fungicide) and ideal conditions, you can stop the spread in 48 hours. However, complete recovery of affected leaves may take longer. Remove severely damaged foliage immediately to help the plant focus on new growth.
Does rain make fungal spot worse?
Yes! Moisture is fungal spot’s best friend. Avoid overhead watering, and water early in the day so leaves dry quickly. If rain is forecasted, apply a protective fungicide beforehand to create a barrier. Space plants properly for airflow—crowded foliage = fungal paradise.
Are there natural alternatives to chemical fungicides?
Try a baking soda spray (1 tsp baking soda + 1 quart water + a drop of dish soap) or a neem oil solution (1 tbsp neem oil per quart of water). For severe cases, though, a copper-free fungicide works faster and more reliably. Always test sprays on a small leaf first!
Will my perennial die if I don’t treat fungal spot?
Not necessarily! Many perennials are hardy and can recover if you act quickly. However, untreated fungal spot can weaken plants, making them susceptible to other diseases or pests. Prune infected leaves, improve airflow, and treat proactively to keep your perennial healthy and happy for years.
Still stumped? Drop your specific plant type or symptoms in the comments—we’re happy to help troubleshoot!
Wrapping up and next steps
Ready to reclaim your garden’s lush beauty without the hassle of toxic copper treatments?
With the right round leaf perennial care and this 48-hour fungal spot cure, you’re just steps away from vibrant, healthy plants! 🌿✨ Start by testing the solution on a small area first—confidence grows with every successful treatment.
Now’s the time to take action—grab your supplies, roll up your sleeves, and give your greens the TLC they deserve. Your garden (and future self) will thank you!