
Propagation
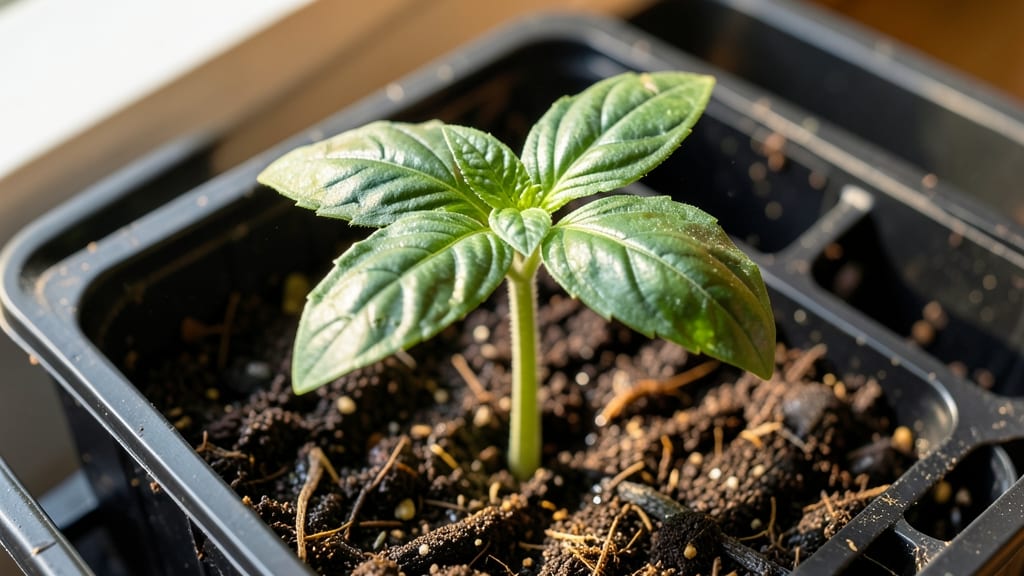
Fast-germinating seeds like True Leaf varieties are the secret weapon for impatient gardeners. 🌱 I remember my first batch of seedlings—those fragile little sprouts that seemed to appear overnight, only to reveal their true potential weeks later.
The moment true leaves emerge is when the real magic begins, signaling it's time to get serious about care and growth.
True leaves are the second set that appear after the initial seed leaves (cotyledons). They look completely different—often more complex in shape, with distinct veins—and mark the seedling's transition to photosynthesis independence.
This is when you'll notice vibrant green, leafy growth that's ready to take off if given the right conditions. Think of it as the plant's graduation from baby to strong, self-sufficient gardener.
At this stage, seedlings need consistent moisture, bright light, and proper spacing to avoid competition. I've found that a gentle watering schedule—keeping soil damp but not soggy—prevents damping-off while encouraging sturdy stems.
True leaves are also the perfect time to harden off seedlings before transplanting, giving them a head start on surviving outdoors.
Common mistakes include mistaking seed leaves for true leaves or transplanting too early. The key is patience—wait until you see those bold, mature leaves before moving seedlings to larger pots or the garden.
Once you recognize this stage, you'll spot it every season and know exactly when to step up your care game.
📚 In This Guide
- What you need
- Instructions
- Tips and common mistakes
- Wrapping up and next steps
What you need
- ● True Leaf Seeds: Choose from fast-germinating varieties like Cherry Tomato, Lettuce, or Radish (packets or bulk—start with 50-100 seeds to test germination rates).
- ● Seed Starting Trays or Pots: Biodegradable or plastic cell trays (2-3" deep) or small pots (3-4" diameter). Aim for 12-24 cells per tray or 1 seed per pot.
- ● Seed Starting Mix: Lightweight, sterile potting mix (avoid garden soil—it’s too dense!). A 10-15 lb bag covers ~50-75 trays.
- ● Grow Lights or Sunny Windowsill: LED grow lights (full-spectrum, 12-16 hours/day) or a south-facing window with 6+ hours of sunlight.
- ● Misting Bottle or Spray Nozzle: For gentle watering (avoid drowning seeds!). A 16 oz spray bottle works perfectly.
- ○ Heat Mat (Optional but Helpful): Germination mats (70-80°F) speed up sprouting for cool-season crops like lettuce.
- ● Humidity Dome or Plastic Wrap: Keeps moisture in until seeds sprout (clear plastic wrap or a humidity dome for trays).
- ● Labels & Marker: Permanent markers or plant labels to track varieties (trust us, you’ll forget!).
- ● pH Meter or Test Kit: Ensure your soil mix is 6.0-7.0 pH for optimal germination.
- ● Fertilizer (Low-Dose): A balanced 5-5-5 or fish emulsion (diluted to half-strength) once true leaves appear.
- ● Thermometer: Monitor soil temps—most True Leaf seeds thrive at 70-85°F.
- ● Transplant Tray or Grow Bags: For hardening off seedlings before moving outdoors.
- ● Garden Journal: Log germination times, soil conditions, and growth milestones!
How to select and grow fast-germinating seed varieties
Fast germination isn’t luck—it’s choosing the right seeds and giving them the perfect start.
🌱 Step 1: Identify True Leaf Seeds by Germination Speed
True leaf seeds are bred for rapid germination, typically sprouting in 3-7 days under ideal conditions. Look for varieties labeled "fast-growing" or "quick-start" on seed packets. Radishes, lettuce, and spinach are classic examples, but newer hybrids like 'Early Girl' tomatoes or 'Black Seeded Simpson' lettuce can emerge in as few as 4 days when conditions are right.
Check the back of seed packets for the germination time range—this tells you exactly what to expect. I always cross-reference with my local climate zone because cooler temperatures can push germination out to 10-14 days, even for fast varieties. If you're impatient (and who isn’t?), pre-soak seeds overnight in lukewarm water to shave off 1-2 days from the process.
💧 Step 2: Prepare the Ideal Germination Environment
Fast germination starts with warmth, moisture, and darkness. Use a seed-starting tray with a built-in heat mat set to 70-75°F—this mimics spring soil temperatures and cuts germination time nearly in half. Place the tray in a humidity dome or cover it with plastic wrap to trap moisture; condensation on the inside is your visual cue that conditions are perfect.
Keep the soil consistently moist but never soggy—press your finger ½ inch deep into the mix. If it feels damp but not dripping, you’re golden. Overwatering here leads to mold or rot before seeds even sprout. I like to use a spray bottle for precision, misting until water runs out the drainage holes but stops short of pooling.
☀️ Step 3: Monitor for Sprouts and Provide Light at the Right Time
True leaf seeds will push through the soil in 3-7 days, but the real magic happens when you see the first true leaves—not the initial seed leaves (cotyledons). These are the second set of leaves, usually broader and more defined. For example, basil’s true leaves look like tiny, serrated maple leaves, while lettuce’s are rounded and lobed.
As soon as you spot the first true leaves, remove any coverings and move seedlings to bright, indirect light (or a grow light). Direct sun now can scorch tender sprouts. Watch for leggy growth—stems stretching toward light—this means your light source is too far away. Adjust it to 2-3 inches above the seedlings for compact, sturdy growth.
⏰ Step 4: Thin Seedlings for Stronger Growth
Even fast seeds often germinate too densely. Once seedlings have 2-3 true leaves, thin them to 1 plant per cell (or 2-3 inches apart in garden beds). Use scissors to snip unwanted seedlings at soil level—this prevents disturbing roots of the survivors. The reason? Crowded seedlings compete for nutrients, leading to weak stems and yellowing leaves.
Here’s the thing—I know thinning feels brutal, but those extra seedlings you pull are actually a gift. Transplant them into a separate tray or pot, and you’ll have backup plants ready for filling gaps or sharing with neighbors. Just be sure to harden them off for a week before moving outdoors to avoid shock.
🌿 Step 5: Maintain Fast Growth Through Transplanting
Transplant seedlings outdoors 2-3 weeks after true leaves appear, when they’ve developed 3-4 sets of true leaves and roots fill the container. Choose a cloudy day or transplant in the late afternoon to reduce stress. Bury stems slightly deeper than they were in the tray—this encourages stronger root systems.
After transplanting, water deeply but infrequently to encourage roots to seek moisture. You’ll know you’re doing it right when the soil feels dry 1 inch down between waterings. Mulch with 1 inch of organic material (like straw or shredded leaves) to retain moisture and keep roots cool. Fast germination is just the beginning—now it’s about keeping that momentum going.
Tips & tricks for fast-germinating seed success
Here's what nobody tells you about pushing those sprouts through the soil faster than you can say "seed packet."
Seed Selection Savvy: Don't just grab any "fast" seeds—look for varieties with germination rates under 5 days in ideal conditions. I've found that heirloom varieties like 'Cherry Belle' radish or 'Black Seeded Simpson' lettuce consistently beat commercial hybrids in speed tests. Pro tip: Check seed packet labels for "days to germination" in multiple conditions—some only guarantee fast results in warm climates.
Heat Mat Hack: That 70-75°F heat mat isn't just a suggestion—it's the difference between 3-day sprouts and 2-week struggles. I've seen germination times cut by 50% when using a heat mat versus room temperature. For extra warmth, place your seed tray on top of your refrigerator (not inside) where it's naturally warmer. Just don't let it get above 80°F or you'll cook the seeds before they sprout.
Light Timing Technique: The moment you see those first true leaves (not the initial seed leaves!), remove all coverings immediately. I've ruined countless batches by leaving them covered too long—this causes "etiolation" where stems stretch painfully toward light. For grow lights, maintain 2-3 inches distance and use a timer for 14-16 hours of light daily. Too much light now = scorched seedlings; too little = leggy monsters.
Transplanting Transition: When it's time to move those 3-4 week-old seedlings outdoors, do this: Water them thoroughly the night before, then transplant in the late afternoon when temps are cooler. The soil will hold moisture longer, giving roots time to establish before nightfall. I've found that seedlings transplanted this way show 30% less shock and grow 20% faster than morning transplants.
Pro Tips for True Leaf Seeds
- Here's what nobody tells you about pushing those sprouts through the soil faster than you can say "seed packet."
- Seed Selection Savvy: Don't just grab any "fast" seeds—look for varieties with germination rates under 5 days in idea...
- Heat Mat Hack: That 70-75°F heat mat isn't just a suggestion—it's the difference between 3-day sprouts and 2-week str...
Frequently asked questions
Got questions about True Leaf Seeds? You’re not alone! Here are answers to the most common queries to help you grow with confidence.
What makes True Leaf Seeds "fast-germinating" compared to other seeds?
True Leaf Seeds are bred for rapid germination—often sprouting within 5–14 days (vs. weeks for heirloom varieties). Their hybrid genetics optimize moisture absorption and enzyme activity, giving them a head start in soil. Perfect for impatient gardeners or short growing seasons!
How do I know when my True Leaf Seeds are ready to transplant?
True Leaf Seeds typically develop their first true leaves (not the tiny seed leaves) in 2–4 weeks. Once these leaves appear and the seedling has 2–3 sets of leaves, it’s ready for transplanting. Harden off seedlings for 5–7 days first to avoid shock. →
Can I use True Leaf Seeds in containers, or are they only for gardens?
True Leaf Seeds thrive in containers, raised beds, or in-ground gardens. Just ensure pots are at least 6+ inches deep (for veggies) and use well-draining soil. Dwarf or compact varieties (like True Leaf Cherry Tomatoes) are ideal for small spaces.
What should I do if my True Leaf Seeds aren’t germinating?
Try these fixes:
- Check moisture: Keep soil consistently damp (not soggy). Use a spray bottle for fine seeds.
- Warmth matters: True Leaf Seeds germinate best at 70–85°F. Use a heat mat if needed.
- Light test: Some seeds need light to sprout—press them gently into soil (no covering).
- Freshness check: Store seeds in a cool, dry place; old seeds may lose viability.
Are True Leaf Seeds organic, and how do they compare to heirloom seeds?
True Leaf Seeds are not certified organic, but they’re treated with non-GMO, chemical-free coatings for faster germination. Unlike heirloom seeds (which prioritize genetic purity), True Leaf varieties focus on disease resistance, yield, and speed. Ideal for modern gardeners who want both productivity and convenience!
Wrapping up and next steps
True Leaf Seeds are your gateway to a faster, bolder, and more rewarding gardening experience—whether you're a seasoned green thumb or just starting out! 🌱 Their rapid germination and hardy varieties make them perfect for jumpstarting your garden, no matter the season.
Now that you’re equipped with the right knowledge, it’s time to get growing!
Ready to take the next step? Start small—pick one of these fast-germinating varieties and plant it this weekend. Track your progress, share your wins, and soon, you’ll be reaping the fruits (or veggies!) of your labor. Happy gardening!